Monday, August 2, 2010

Handling Bounces yourself

IndiMail allows a mechanism by which you can use your own script/program to handle bounces. All bounces in IndiMail is generated by qmail-send. qmail-send generates a bounce when qmail-lspawn or qmail-rspawn reports a permanent failed delivery. A bounce is generated by qmail-send by injecting a new mail in the queue using qmail-queue. This bounce generation by qmail-send can be modified in three ways

1. Using environment variable BOUNCEPROCESSOR

When you define the environment variable BOUNCEPROCESSOR as a valid path to a program or script, the program gets called whenever a delivery fails permanently. The program runs with the uid qmails and is passed the following five arguments

bounce_file bounce_report bounce_sender original_recipient bounce_recipient

To set BOUNCEPROCESSOR, you would do the following

# echo "path_of_your_bounce_processor" > /service/qmail-send.25/variables/BOUNCEPROCESSOR

There are few email marketing companies who are using BOUNCEPROCESSOR to insert the status of all bounces in MySQL table for their email marketing campaigns.

2 Using environment variable BOUNCERULES or control files bounce.envrules.

Using envrules, you can set specific environment variables only for bounced recipients. The format of  this  file  is  of  the  form

pat:envar1=val,envar2=val,...]

where pat is a regular expression which matches a bounce recipient.  envar1, envar2 are list of environment variables to be set. If var is omitted, the environment variable is unset.

e.g.

support@indimail.org:CONTROLDIR=control2,QMAILQUEUE=/var/indimail/bin/qmail-nullqueue

causes all bounces generated for the sender support@indimail.org to be discarded.

3. Using BOUNCEQUEUE environment variable to queue bounces


qmail-send  uses  qmail-queue to queue bounces and aliases/forwards. This can be changed by using QMAILQUEUE environment variable. If a different queue program is desired for bounces, it can be set by using BOUNCEQUEUE environment variable.

e.g

# echo /var/indimail/bin/qmail-nullqueue > /service/qmail-send.25/variables/BOUNCEQUEUE

disables bounces system-wide. Though disabling bounces may not be the right thing to do but in some situations where bounces are not at all needed, disabling bounces will surely result in performance improvements of your system, especially so if your system does mass-mailing.

Tuesday, July 13, 2010

Delivery Instructions for a Virtual Domain

IndiMail uses a modified version of qmail as the MTA. For local deliveries, qmail-lspawn reads a series of local delivery commands from descriptor 0, invokes qmail-local to perform the deliveries. qmail-local reads a mail message and delivers to to a user by the procedure described in dot-qmail(5). IndiMail uses vdelivermail as the local delivery agent.

A virtual domain is created by the command vadddomain(1).

% vadddomain example.com some_password

The above command creates a virtual domain with delivery instructions in /var/indimail/domains/example.com/.qmail-default file. A line in this file is of the form

/var/indimail/sbin/vdelivermail '' delivery_instruction_for_non_existing_user

The delivery_instruction_for_non_existing_user can have one of the following 5 forms

  1. delete
  2. bounce-no-mailbox
  3. Maildir
  4. emailAddress
  5. IPaddress
Using delete as the delivery instruction causes IndiMail to discard all mails addressed to non-existing users. The original sender does not get notified of the delivery. On a real messaging system serving real users, you will not want to do this.

The instruction bounce-no-mailbox causes a bounce to be generated to the sender in case an email is addressed to a non-existing user. This is the most common usage in .qmail-default which most IndiMail installations will have

The instruction Maildir causes emails to be addressed to non-existing users to be saved in a Maildir. Here Maildir should refer to a full path of an existing Maildir.

The instruction emailAddress causes emails to be addressed to non-existing users to be forwarded to an email address emailAddress.

The instruction IPaddress causes emails to be addressed to non-existing users to be redirected to a remote SMTP server at IP IPaddress. The format of IPaddress is domain:ip:port where domain is the domain name, ip is the IP address of the remote SMTP server and port is the SMTP port on the remote SMTP server. It is expected that the non-existing user is present on the remote system. This type of delivery is used by IndiMail on a clustered setup. In a clustered setup, users are distributed across multiple server. A particular user will be located only on one particular server. However, the same domain will be present on multiple servers.

In the delivery instruction in .qmail-default, you can replace vdelivermail with vfilter to perform in-line filtering use IndiMail's poweful vfilter. You can create filters using the program vcfilter.

Thursday, July 8, 2010

Relaying - How does IndiMail handle relaying securely

A SMTP server is responsible for accepting mails from a sender and processing it for delivery to one or more recipients. In most situations, for domains which are under your administrative control (native addresses), the SMTP server should accept mails without authentication. However, when a mail is submitted for delivery to domains which are not under your administrative control, you should accept mails only after it satisfies security considerations like having the sender authenticate itself. This is to prevent abuse of external domains using your SMTP server. A SMTP server which accepts mails for external domains without any authentication is called an open relay. The act of accepting mails for external domains for delivery is called relaying.

The default configuration of IndiMail configures the SMTP as a closed system. Hence to be able to send mails to external domains, you need to setup mechanisms for relaying.

There are many methods. Choose any of the below after studying them. I prefer 3 or 4 for security reasons.
  1. Have Sender's IP addresses in tcp.smtp file
  2. Use control file relayclients for IP addresses of clients allowed to relay mail through this host.
  3. Configure IndiMail to use MySQL relay table (good security). This is implemented on POP3/IMAP before SMTP
  4. Use authenticated SMTP (good security)
  5. For allowing relay to specific domains use control file relaydomains
  6. For allowing specific users (native addresses) use control file relaymailfrom
  • NOTE: you should use 1 & 2 only if if the host having the sender's IP is under your control and you have good security policies for the host (however what is a good security can be very subjective)
Using tcp.smtp

Your startup script for the qmail smtp server must use the tcpserver -x file option similar to this startup line.

env - PATH="/var/indimail/bin" tcpserver -H -R -x /var/indimail/etc/tcp.smtp.cdb \
-c 20 -u 555 -g 555 0 smtp /var/indimail/bin/qmail-smtpd 2>&1

IndiMail uses -x option to tcpserver and hence you need not bother about the above line. You however need to edit /var/indimail/etc/tcp.smtp and put in lines for all static IP's that you will always want to relay access to.

127.0.0.:allow,RELAYCLIENT=””
10.1.1.:allow,RELAYCLIENT=””

The above lines will cause RELAYCLIENT environment variable to be set for localhost and all machines on the 10.1.1 class and hence allow to relay through. Remember that any user on hosts on 10.1.1 class will be able to relay mails. You many not want this. The line having 127.0.0. will allow any client on the IndiMail host to use SMTP and relay mails.

If you add any IP to tcp.smtp, you have to rebuild a cdb database tcp.smtp.cdb. You can run the following command

% sudo /var/indimail/bin/qmailctl cdb


NOTE: Remember that you are exposed to unrestricted relaying from any of the IP addresses listed in tcp.smtp

Using control file relayclients

IP addresses of clients allowed to relay mail  through  this  host.   Each address should be followed by a colon and an (optional) string that should be appended to each incoming recipient address, just as  with  the  RELAYCLIENT environment variable.  Nearly always, the optional string should be null. The filename can be overriden by  the  environment  variable  RELAYCLIENTS.

Addresses in relayclients may be wildcarded (2nd line in the example below):

 192.168.0.1:
 192.168.1.:

Using MySQL relay table

Run the command /var/indimail/bin/clearopensmtp in the cron every 30 Minutes

By default every time who uses IndiMail's  POP3 or IMAP service and authenticates, the following happens:
  1. On successful authentication, IMAP/POP3 daemon inserts entry into relay table, inserting email, IP address and timestamp.
  2. If CHECKRELAY environment variable is enabled, SMTP checks the relay table for a entry within minutes specified by the RELAY_CLEAR_MINUTES environment variable. If the entry is there, RELAYCLIENT environment variable is set, which allows relaying. At this point, the SMTP server will allow that IP to relay for 60 Mins (default)
clearopensmtp will clear all IP which have not authenticated in the past RELAY_CLEAR_MINUTESclearopensmtp should be enabled in cron to run every 30 minutes.

Set up Authenticated SMTP

IndiMail also provides you authenticated SMTP providing AUTH PLAIN, AUTH LOGIN and AUTH CRAM-MD5 methods. Whenever a user successfully authenticates through SMTP, the RELAYCLIENT environment variable gets set. qmail-smtpd uses the RELAYCLIENT environment variable to allow relaying.

Most of the email clients like thunderbird, evolution, outlook, outlook express have options to use authenticated SMTP.

For a tutorial on authenticated SMTP, you can refer to
http://indimail.blogspot.com/2010/03/authenticated-smtp-tutorial.html

Using control file relaydomains

Host  and  domain  names  allowed  to  relay mail through this host.  Each  
address should be followed by a colon and an (optional) string that should 
be  appended  to  each incoming recipient address, just as with the RELAY\
CLIENT environment variable.  Nearly always, the optional string should be 
null. 
Addresses in relaydomains may be wildcarded:


  heaven.af.mil:
  .heaven.af.mil:

Using control file relaymailfrom

envelope  senders (MAIL FROM) listed in this file will be allowed to relay independently of the RELAYCLIENT environment variable. Entries in relaymailfrom can be E-Mail addresses, or just the domain (with the @ sign).

Unlike relaydomains native addresses should be entered.  A line in  relay mailfrom  may be of the form @host, meaning every address at host.  relaymailfrom can also be in cdb format. If relaymailfrom.cdb  is  present,  it will be searched first.

Examples:
  joeblow@domain1.com
  @domain2.com

If you use the control file /var/indimail/control/relaymailfrom, you should really know what you are doing. Any mail from having a domain component of the address matching any domain in this file, relaying will be allowed without any authentication. You can most probably use this only if you have a closed SMTP server to which access from outside is not possible.

Wednesday, June 30, 2010

Setting Disclaimers on your outgoing mails

In my earlier article, I showed how to set up automatic rule based archival. I had discussed email archival as one of the many compliance requirements you might have. Sometimes you may also require to configure disclaimers in your messaging system. e.g for UK Companies Act 2006, IRS Circular 230.

IndiMail provides a utility called altermime(1) to add your own disclaimers on each and every mail that goes out through your IndiMail messaging server. You can use any of the two options below to configure disclaimers

Option 1 - using /var/indimail/control/filterargs

The filterargs control file allows you to insert any filter before remote or local delivery. You can use altermime to insert a disclaimer as below

*:/var/indimail/bin/altermime --input=- \
--disclaimer=/var/indimail/control/disclaimer

If you want disclaimer to be used only for your outgoing mails then, you could do the following

*:remote:/var/indimail/bin/altermime --input=- \
--disclaimer=/var/indimail/control/disclaimer

In both the above examples the file /var/indimail/control/disclaimer contains the text of your disclaimer

Option 2 - Set the FILTERARGS environment variable
Just like filterargs control file, the environment variable FILTERARGS allows you to set any custom filter before your mail gets deposited into the queue by qmail-queue(8).

% su
# echo /var/indimail/bin/altermime --input=- --disclaimer=/var/indimail/control/disclaimer \
> /service/qmail-smtpd.587/variables/FILTERARGS
# svc -d /service/qmail-smtpd.587
# svc -u /service/qmail-smtpd.587

Read altermime(1) man page for more details

You can download IndiMail at
http://sourceforge.net/projects/indimail/

The RPM can be downloaded from
http://download.opensuse.org/repositories/home:/indimail/

Subscribe to indimail

Email:

Visit this group

Saturday, June 26, 2010

Email Archiving

IndiMail provides multiple options for those who want their emails archived automatically.

For easy retrieval, you can use tools like google desktop, beagle, etc

If you use IndiMail, you have two methods to achieve automatic archiving of emails

1. using environment variable EXTRAQUEUE
If EXTRAQUEUE environment variable is set to any environment variable, qmail-queue will deposit an extra copy of the email which it receives for putting it in the queue. Normally you would set EXTRAQUEUE variable in any of the clients which use qmail-queue. e.g. qmail-smtpd, qmail-inject, sendmail, etc. If you have setup IndiMail as per the official instructions, you can set EXTRAQUEUE for incoming and outgoing mails as given below

% su
# echo "archive@example.com" > /service/qmail-smtpd.25/variables/EXTRAQUEUE
# echo "archive@example.com" > /service/qmail-smtpd.587/variables/EXTRAQUEUE
# svc -d /service/qmail-smtpd.25 /service/qmail-smtpd.587
# svc -u /service/qmail-smtpd.25 /service/qmail-smtpd.587
# exit
Now all your emails coming in and going out of the system, a copy will be sent to archive@example.com. If archive@example.com lies on IndiMail Messaging Platform, you can set filters (using vfilter(1)) to automatically deposit the mails in different folders. The folders can be decided on various criteria like date, sender, recipient, domain, etc.

2. using control file mailarchive
This control file allows you to set up rule based archiving. For any specific sender or recipient, you can set a rule to select a destination email for archiving. This is much more flexible than using EXTRAQUEUE which allowed you to archive emails to a single email address. A line in the control file mailarchive can be of the form

type:regexp:dest_address

Here type is 'T' to set a rule on recipients. You can set the type as 'F' to set a rule on the sender.

regexp is any email address which matches the sender or recipient (depending on whether type is 'T' or 'F').

dest_address should expand to a valid email address. You can have a valid email address. You can also have the '%' sign followed by the letters u, d or e in the address to have the following substitutions made

%u - gets replaced by the user component of email address (without the '@' sign)
%d - gets replaced by the domain component of email address
%e - gets replaced by the email address

The email address in the above substitution will be the recipient (if type is 'T') and the sender (if type is 'F').

another example and a cool tip :)

T:*:%u@arch%d

Will make a hot standby of your incoming mails for yourdomain on another server hosting archyourdomain.

NOTE: Currently only type = 'F' is implemented. type='T' will be implemented in release 1.7.8

For some organizations, email archiving is a must due to compliance with regulatory standards like SOX, HIPAA, Basel II Accord (effective 2006), Canadian Privacy Act, Data Protection Act 1988, EU Data Protection Directive 95/46/FC, Federal Information Security Management Act (FISMA), Federal Rules of Civil Procedure (FRCP), Financial Services Act 198, regulated by FSA, Freedom of Information Act (FOIA), Freedom of Information Act (in force January 2005), The Gramm-Leach-Bliley Act (GLBA), MiFID (Markets in Financial Instruments Directives), PIPEDA (Personal Information Protection and Electronic Documents Act), SEC Rule 17a-4/ NASD 3010 (Securities Exchange Act 1934).

Apart from archiving, you would also want to set disclaimers. IndiMail allows you to set a disclaimer by setting the FILTERARGS environment variable and using altermime(1). The following acts/circular specifically require you to set disclaimers.


Reference


You can download IndiMail at
http://sourceforge.net/projects/indimail/

The RPM can be downloaded from
http://download.opensuse.org/repositories/home:/indimail/


Subscribe to indimail

Email:

Visit this group

Thursday, June 10, 2010

Setting Limits for your Virtual Domain

IndiMail comes with a program vlimit(1), which allows you to set global limits for your domain. Before using vlimit, you need to enable domain limits for a domain using vmoddomain(1).

% vmoddomain -l 1 example.com

Once you have done the above, you can start using vlimit for the domain example.com

% vlimit -s example.com
Domain Expiry Date : Never Expires
Password Expiry Date : Never Expires
Max Domain Quota : -1
Max Domain Messages : -1
Default User Quota : -1
Default User Messages: -1
Max Pop Accounts : -1
Max Aliases : -1
Max Forwards : -1
Max Autoresponders : -1
Max Mailinglists : -1
GID Flags:
Flags for non postmaster accounts:
pop account : ALLOW_CREATE ALLOW_MODIFY ALLOW_DELETE
alias : ALLOW_CREATE ALLOW_MODIFY ALLOW_DELETE
forward : ALLOW_CREATE ALLOW_MODIFY ALLOW_DELETE
autoresponder : ALLOW_CREATE ALLOW_MODIFY ALLOW_DELETE
mailinglist : ALLOW_CREATE ALLOW_MODIFY ALLOW_DELETE
mailinglist users : ALLOW_CREATE ALLOW_MODIFY ALLOW_DELETE
mailinglist moderators: ALLOW_CREATE ALLOW_MODIFY ALLOW_DELETE
domain quota : ALLOW_CREATE ALLOW_MODIFY ALLOW_DELETE
default quota : ALLOW_CREATE ALLOW_MODIFY

Using vlimit you can set various limits or defaults for a domain. One of my favourite use of vlimit is setting default quota for users created in a domain. The default quota compiled in IndiMail is 5Mb which is not good enough for today's users. So if you want to have a default quota of 50 Mb for your users when you add them using the vadduser(1) command -

% vlimit -q 52428800 example.com
% vlimit -s example.com
Domain Expiry Date : Never Expires
Password Expiry Date : Never Expires
Max Domain Quota : -1
Max Domain Messages : -1
Default User Quota : 52428800
Default User Messages: -1
Max Pop Accounts : -1
Max Aliases : -1
Max Forwards : -1
Max Autoresponders : -1
Max Mailinglists : -1
GID Flags:
Flags for non postmaster accounts:
pop account : ALLOW_CREATE ALLOW_MODIFY ALLOW_DELETE
alias : ALLOW_CREATE ALLOW_MODIFY ALLOW_DELETE
forward : ALLOW_CREATE ALLOW_MODIFY ALLOW_DELETE
autoresponder : ALLOW_CREATE ALLOW_MODIFY ALLOW_DELETE
mailinglist : ALLOW_CREATE ALLOW_MODIFY ALLOW_DELETE
mailinglist users : ALLOW_CREATE ALLOW_MODIFY ALLOW_DELETE
mailinglist moderators: ALLOW_CREATE ALLOW_MODIFY ALLOW_DELETE
domain quota : ALLOW_CREATE ALLOW_MODIFY ALLOW_DELETE
default quota : ALLOW_CREATE ALLOW_MODIFY


You can also implement domain level restrictions. To disable POP3 for all users in example.com

% vlimit -g p example.com
% vlimit -s example.com
Domain Expiry Date : Never Expires
Password Expiry Date : Never Expires
Max Domain Quota : -1
Max Domain Messages : -1
Default User Quota : 52428800
Default User Messages: -1
Max Pop Accounts : -1
Max Aliases : -1
Max Forwards : -1
Max Autoresponders : -1
Max Mailinglists : -1
GID Flags:
NO_POP
Flags for non postmaster accounts:
pop account : ALLOW_CREATE ALLOW_MODIFY ALLOW_DELETE
alias : ALLOW_CREATE ALLOW_MODIFY ALLOW_DELETE
forward : ALLOW_CREATE ALLOW_MODIFY ALLOW_DELETE
autoresponder : ALLOW_CREATE ALLOW_MODIFY ALLOW_DELETE
mailinglist : ALLOW_CREATE ALLOW_MODIFY ALLOW_DELETE
mailinglist users : ALLOW_CREATE ALLOW_MODIFY ALLOW_DELETE
mailinglist moderators: ALLOW_CREATE ALLOW_MODIFY ALLOW_DELETE
domain quota : ALLOW_CREATE ALLOW_MODIFY ALLOW_DELETE
default quota : ALLOW_CREATE ALLOW_MODIFY


You can download IndiMail at
http://sourceforge.net/projects/indimail/

The RPM can be downloaded from
http://download.opensuse.org/repositories/home:/indimail/


Subscribe to indimail

Email:

Visit this group

Tuesday, June 1, 2010

using openLDAP for addressbook

By now I have got exhausted answering folks 'Why IndiMail does not have a shared addressbook'

IndiMail is a pure messaging platform. It does not attempt to do things which can be done better by other software like openLDAP etc.

However, things can get bit tricky setting up an address book using openLDAP. This tutorial should make it easy for you to install your own shared address book. The commands below have worked for me on my linux laptop which is proudly powered by Fedora 12. The commands / configuration may slightly vary for your Linux distro / openLDAP version.


Install openldap


% sudo yum install openldap openldap-servers openldap-clients

Configure openldap

You need to start slapd to implement openldap. slapd uses configurion
file /etc/openldap/slapd.conf

The following slapd.conf file contains the basic configurations required to establish a shared address book on a secure network, however there are no access controls yet defined; security is covered later on. The encrypted root password (rootpw) should be substituted where necessary. You can use slappasswd to generate the password

% slappasswd -s secret
{SSHA}gDPX3cS87+B31mAF5zHCGtEJBYSuqrN/


#
# See slapd.conf(5) for details on configuration options.
# This file should NOT be world readable.
#
include /etc/openldap/schema/corba.schema
include /etc/openldap/schema/core.schema
include /etc/openldap/schema/cosine.schema
include /etc/openldap/schema/duaconf.schema
include /etc/openldap/schema/dyngroup.schema
include /etc/openldap/schema/inetorgperson.schema
include /etc/openldap/schema/java.schema
include /etc/openldap/schema/misc.schema
include /etc/openldap/schema/nis.schema
include /etc/openldap/schema/openldap.schema
include /etc/openldap/schema/ppolicy.schema
include /etc/openldap/schema/collective.schema

#######################################################################
# ldbm and/or bdb database definitions
#######################################################################

database bdb
suffix "dc=indimail,dc=org"
checkpoint 1024 15
rootdn "cn=Manager,dc=indimail,dc=org"
rootpw {SSHA}gDPX3cS87+B31mAF5zHCGtEJBYSuqrN/
# The database directory MUST exist prior to running slapd AND
# should only be accessible by the slapd and slap tools.
# Mode 700 recommended.
directory /var/lib/ldap

# Sample access control policy:
# Root DSE: allow anyone to read it
# Subschema (sub)entry DSE: allow anyone to read it
# Other DSEs:
# Allow self write access
# Allow authenticated users read access
# Allow anonymous users to authenticate
# Directives needed to implement policy:
# access to dn.base="" by * read
# access to dn.base="cn=Subschema" by * read
# access to *
# by self write
# by users read
# by anonymous auth
#
# if no access controls are present, the default policy
# allows anyone and everyone to read anything but restricts
# updates to rootdn. (e.g., "access to * by * read")
#
# rootdn can always read and write EVERYTHING!

access to dn.subtree="ou=addressbook,dc=indimail,dc=org"
by anonymous auth
by self write
by users read
access to *
by anonymous auth
by self read
by users read

# Indices to maintain for this database
index objectClass eq,pres
#index ou,cn,mail,surname,givenname eq,pres,sub
#index uidNumber,gidNumber,loginShell eq,pres
#index uid,memberUid eq,pres,sub
#index nisMapName,nisMapEntry eq,pres,sub

Make user that /etc/openldap/slapd.conf is owned by ldap and has write permissions for ldap user.

As of now I prefer openldap using slapd.conf and not slapd.d for configuration.

% sudo /bin/rm -r /etc/openldap/slapd.d

slapd Startup

My favourite method happens to be using djb's supervise and hence is one of the core compoment of the IndiMail package

% cat > /tmp/run1
#!/bin/sh
exec /usr/sbin/slapd -u ldap -f /etc/openldap/slapd.conf -d 0 2>&1
cntrl-d

% cat > /tmp/run2
#!/bin/sh
exec /var/indimail/bin/setuidgid qmaill \
/var/indimail/bin/multilog t /var/log/indimail/slapd.389
cntrl-d

# create /service/.slapd.389 so that svscan does not discover this new service yet
% sudo mkdir -p /service/.slapd.389/log
% sudo mv /tmp/run2 /service/.slapd.389/log/run
% sudo mv /tmp/run1 /service/.slapd.389/run
% sudo chmod +x /service/.slapd.389/run /service/.slapd.389/log/run

# rename .slapd.389 to slapd.389 for svscan to discover and start slapd
% sudo mv /service/.slapd.389 /service/slapd.389

% svstat /service/slapd.389
/service/slapd.389/: up (pid 4069) 4 seconds

AddressBook Entries

Information can be imported and exported into an LDAP directory service using the LDAP Data Interchange Format (LDIF) as defined in RFC2849. An LDIF file specifies the contents of a directory entry in a human readable text format, this allows quick manipulation of a file to re-import similar entries into the directory.

Now that the LDAP server has been configured and is running, we can conduct a simple search of the naming context to see our directory information before we start to import our entries.

The "namingContexts" should be similar to the example below.

% ldapsearch -x -b '' -s base '(objectclass=*)' namingContexts
# extended LDIF
#
# LDAPv3
# base <> with scope base
# filter: (objectclass=*)
# requesting: namingContexts

dn:
namingContexts: dc=indimail,dc=org

# search result
search: 2
result: 0 Success

# numResponses: 2
# numEntries: 1

The following LDIF file will create the hierarchical directory service structure that we will be using for indimail's address book. The first entry is that of the base directory and the second entry is for the Manager's (administrator) account. The last two entries are the two organisational units that we will use to store the authorised users (for adding security later) and the address book entries.

The bolded entries should be changed to suit your configuration requirements.

% cat > addressbook.ldif
# Domain entry
dn: dc=indimail,dc=org
o: IndiMail LDAP Server
dc: indimail
objectclass: dcObject
objectclass: organization

# Manager entry
dn: cn=Manager,dc=indimail,dc=org
cn: Manager
objectclass: organizationalRole

# Users
dn: ou=users,dc=indimail,dc=org
ou: users
objectClass: top
objectClass: organizationalUnit

# Addressbook entry
dn: ou=AddressBook,dc=indimail,dc=org
ou: AddressBook
objectClass: top
objectClass: organizationalUnit
cntrl-d

% ldapadd -x -D 'cn=Manager,dc=indimail,dc=org' -W -f addressbook.ldif
Enter LDAP Password:
adding new entry "dc=indimail,dc=org"
adding new entry "cn=Manager,dc=indimail,dc=org"
adding new entry "ou=users,dc=indimail,dc=org"
adding new entry "ou=addressbook,dc=indimail,dc=org"

The following LDAP search is requesting a listing of all entries starting from the base "dc=indimail,dc=org". This should return all of the entries that where added in the previous step.

% ldapsearch -x -b 'dc=indimail,dc=org' '(objectclass=*)'

# indimail.com
dn: dc=indimail,dc=org
objectClass: top
objectClass: dcObject
objectClass: organization
o: Home LDAP Network
dc: indimail

# Manager, indimail.com
dn: cn=Manager,dc=indimail,dc=org
objectClass: organizationalRole
cn: Manager

# users, indimail.com
dn: ou=users,dc=indimail,dc=org
ou: users
objectClass: top
objectClass: organizationalUnit

# addressbook, indimail.com
dn: ou=addressbook,dc=indimail,dc=org
ou: addressbook
objectClass: top
objectClass: organizationalUnit

Now that we have defined and imported our directory scheme, we are able to create user entries to populate the addressbook. The following is a simple example LDIF entry for a contact.

You can gain use slappasswd to generate a user password

% slappasswd -h {MD5} -s manny
{MD5}j+eKwOqr8vR0sN46lo4WXg==

The first line (dn:) designates where about in the directory the entry will belong when its imported, this should be changed to suit your needs.

% cat > newcontact.ldif
dn:uid=mbhangui,ou=addressbook,dc=indimail,dc=org
uid: mbhangui
cn: Manvendra Bhangui
gn: Manvendra
sn: Bhangui
o: Consim Info Pvt. Ltd.
l: Mandaivelli
street: #94 Coconut Republic
st: TN
postalCode: 600028
pager: +91 44 5555 1111
homePhone: +91 44 5555 1234
telephoneNumber: +91 44 5555 1235
facsimileTelephoneNumber: +91 44 5555 1236
mobile: +91 99401xxxxx
mail: m.bhangui@gmail.com
objectClass: top
objectClass: inetOrgPerson
userPassword: {MD5}j+eKwOqr8vR0sN46lo4WXg==
cntrl-d

The contents of the LDIF file can be added into the directory service using the "ldapadd" command below.

% ldapadd -x -D 'cn=Manager,dc=indimail,dc=org' -W -f newcontact.ldif
Enter LDAP Password:
adding new entry "uid=mbhangui,ou=addressbook,dc=indimail,dc=org"

If you do not require an address book and just require a basic user object to use for authenticaton, a basic user object can be created and imported into the LDAP server. This file uses the "UID" (User ID) string to distinguish the object and the contents are all that we need to create a basic authentication mechanism.

It should also be noted that this object is stored in the "users" organisational unit, which is located outside of the address book directory.=

% cat > useraccount.ldif
dn:uid=postmaster,ou=users,dc=indimail,dc=org
uid: postmaster
userPassword: {MD5}j+eKwOqr8vR0sN46lo4WXg==
objectClass: top
objectClass: account
objectClass: simpleSecurityObject
cntrl-d

% ldapadd -x -D 'cn=Manager,dc=indimail,dc=org' -W -f useraccount.ldif
Enter LDAP Password:
adding new entry "uid=postmaster,ou=users,dc=indimail,dc=org"

For mbhangui to authenticate to the server, one needs to pass
"uid=mbhangui,ou=users,dc=indimail,dc=org" as username along with the the plain text value of password, the hashed value is only for storage purposes.

% ldapsearch -x -b 'ou=AddressBook,dc=indimail,dc=org' \
-D "uid=mbhangui,ou=users,dc=indimail,dc=org" '(objectclass=*)' \
-s sub -w manny

Backing up LDAP Database

To export
% sudo /var/indimail/bin/svc -d /service/slapd.389
% slapcat -vl /etc/openldap/backup_slapd.ldif
% sudo /var/indimail/bin/svc -u /service/slapd.389

To import
% sudo /var/indimail/bin/svc -d /service/slapd.389
% slapadd -vl /etc/openldap/backup_slapd.ldif
% chown ldap.ldap /var/lib/ldap/*
% sudo /var/indimail/bin/svc -u /service/slapd.389

Email Client Settings

The last steps in setting up the shared address book is to configure the users email clients to access the LDAP server.

The following table contains some of the information needed to configure the client applications. Note the username will need to be written as the complete "distinguished name" value so the server knows which object to authenticate.

LDAP Server : your_host_IP:389
Search Base : ou=addressbook,dc=indimail,dc=org
Login Method : use distinguished name (if listed)
Username : uid=user,ou=addressbook,dc=indimail,dc=org
Password : As entered in newcontact.ldif file (plain text version)
Secure Connection: Never (unless encryption has been configured)

In the above 'user' is the actual user created in ldap by using ldapadd

References
  1. http://www.brennan.id.au/20-Shared_Address_Book_LDAP.html
  2. http://www.wains.be/mirrors/feldt.com/
  3. http://linsec.ca/Using_OpenLDAP_as_an_Address_Book

Friday, May 21, 2010

Mini IndiMail Installation

IndiMail 1.7.3 comes with option in svctool to install QMQP service. IndiMail 1.7.5 will come with RPM package indimail-mini which will allow you to install a mini indimail installation. A mini indimail installation comes up with a bare minimum list of programs to enable you to send out mails. A indimail-mini installation doesn't have a mail queue. Instead it gives each new message to a central server through QMQP.

Many of my friends run web servers which need to send out emails. If you already have an installation of IndiMail messaging server on your network, you can quickly setup a mini indimail installation on your web server, without impacting the performance by using QMQP. To use QMQP service, you need to have QMQP service running on your IndiMail messaging server. All other servers (including your webservers) can have a indimail-mini installation.

How do I set up a QMQP service?

You need to have at least one host on your network offering QMQP service to your clients. IndiMail includes a QMQP server, qmail-qmqpd. Here's how to set up QMQP service to authorized client hosts on your IndiMail messaging server.

first create /var/indimail/etc/tcp.qmqp in tcprules format to allow queueing from the authorized hosts. make sure to deny connections from unauthorized hosts. for example, if queueing is allowed from 1.2.3.*:

1.2.3.:allow
:deny

Then create /var/indimail/etc/tcp.qmqp.cdb:

% sudo /var/indimail/bin/tcprules /var/indimail/etc/tcp.qmqp.cdb \
/var/indimail/etc/qmqp.tmp < /var/indimail/etc/tcp.qmqp


You can change /var/indimail/etc/tcp.qmqp and run tcprules again at any time. Finally qmail-qmqpd to be run under supervise:

% sudo /var/indimail/sbin/svctool --qmqp=628 --servicedir=/service \
--qbase=/var/indimail/queue --qcount=5 --qstart=1 \
--cntrldir=control --localip=0 \
--maxdaemons=75 --maxperip=25 --fsync --syncdir \
--memory=104857600 --min-free=52428800


628 is the TCP port for QMQP.

How do I install indimail-mini?

A indimail-mini installation is just like a indimail installation, except that it's much easier to set up:

* You don't need MySQL

* You don't need /var/indimail/alias. A indimail-mini installation doesn't do any local delivery.

* You don't need indimail entries in /etc/group or /etc/passwd. indimail-mini runs with the same privileges as the user sending mail; it doesn't have any of its own files.

* You don't need to start anything from your boot scripts. indimail-mini doesn't have a queue, so it doesn't need a long-running queue manager.

* You don't need to add anything to inetd.conf. A null client doesn't receive incoming mail.

Here's what you do need:

* qmail-qmqpc, forward, qmail-inject, sendmail, predate, datemail, mailsubj, qmail-showctl, maildirmake, maildir2mbox, maildirwatch, qail, elq, and pinq in /var/indimail/bin;

* a symbolic link to qmail-qmqpc from /var/indimail/bin/qmail-queue;

* symbolic links to /var/indimail/bin/sendmail from /usr/sbin/sendmail and /usr/lib/sendmail (for Fedora see the topic on /usr/sbin/alternatives below)

* all the manual pages in /var/indimail/man;

You can install all the above by manually copying the binaries and man pages from a host having standard IndiMail installation or you can using the indimail-mini RPM

% sudo rpm -ivh indimail-mini-1.7.5-1.1.i386.rpm

Apart from the binaries, you need to do the following

* a list of IP addresses of QMQP servers, one per line, in /var/indimail/control/qmqpservers;

* a copy of /var/indimail/control/me, /var/indimail/control/defaultdomain, and /var/indimail/control/plusdomain from your central server, so that qmail-inject uses appropriate host names in outgoing mail; and

* this host's name in /var/indimail/control/idhost, so that qmail-inject generates Message-ID without any risk of collision.

Everything can be shared across hosts except for /var/indimail/control/idhost.

Remember that users won't be able to send mail if all the QMQP servers are down. Most sites have two or three independent QMQP servers.

Note that users can still use all the qmail-inject environment variables to control the appearance of their outgoing messages.

Fedora - Using /usr/sbin/alternatives
Sometimes two or more Fedora package exist that serve the same purpose. The alternatives system provides a mechanism for selecting an active default application from several valid alternatives. You can use the alternatives system to configure as an alternative MTA for your system. Using alternatives, you don't have to create the links to /var/indimail/bin/sendmail manually as instructed above.

% sudo /usr/sbin/alternatives --install \
/usr/sbin/sendmail mta /var/indimail/bin/sendmail 120 \
--slave /usr/share/man/man8/sendmail.8.gz mta-sendmailman \
/var/indimail/man/man8/qmail-inject.8.gz \
--slave /usr/lib/sendmail mta-sendmail \
/var/indimail/bin/sendmail
/usr/sbin/alternatives --set mta /var/indimail/bin/sendmail


You can download IndiMail at
http://sourceforge.net/projects/indimail/

The RPM can be downloaded from
http://download.opensuse.org/repositories/home:/indimail/

NOTE: This document is based on 'Installing min-qmail' by djb

Sunday, May 2, 2010

Instant Mail to domains added by vadddomain

IndiMail has a program called vbulletin using which you can instantly email all your subscribers in a domain that has been created using vadddomain. Whenever an authentication requests comes to IndiMail through POP3, IMAP or authenticated SMTP, a hook called Login_Tasks gets called. One of the job that Login_Tasks does is to look for a file, in RFC822 format, with ",all" in the end of the filename. If such a file is found, it is copied to the user's Maildir. By using the timestamp of the original file, Login_Tasks also ensures that the file is copied once only.

The good thing about using bulletins is that the email is available instantly to all users. No queues, no delays and a huge saving of system resources.

You can manually copy the file to /var/indimail/control/domain_name/bulk_mail directory or use the vbulletin command

% vbulletin -f /tmp/new_offers.eml -a example.com

vbulletin is especially useful when you want to target a subsection of your users or when you have large number of mail delivery hosts in an IndiMail cluster.

Read the man page vbulletin(1) for more details

Thursday, April 29, 2010

Spam Control using badip control file

IndiMail has many methods to help deal with spam. For detecting spam, IndiMail uses bogofilter a fast bayesian spam filter. IndiMail's qmail-smtpd which provides SMTP protocol is neatly integrated with bogofilter. When bogofilter detects spam, qmail-smtpd prints the X-Bogosity header as part of SMTP transaction log
% grep "X-Bogosity, Yes" /var/log/svc/smtpd.25/current
@400000004bc8183f01fcbc54 qmail-smtpd: pid 16158 from ::ffff:88.191.35.203 HELO X-Bogosity: Yes, spamicity=0.999616, cutoff=9.90e-01, ham_cutoff=0.00e+00, queueID=6cs66604wfk,


The value "Yes" in X-Bogosity indicates spam. You can tell qmail-smtpd to reject such mails at SMTP just by doing
# echo 1 > /service/qmail-smtpd.25/variables/REJECTSPAM
# svc -
d /service/qmail-smtpd.25
# svc -
u /service/qmail-smtpd.25


SMTP clients which tries to send a spam mail will get the following error at the end of the SMTP transaction
554 SPAM or junk mail threshold exceeded (#5.7.1)
The mail will get bounced. In some cases you would want to issue temporary error to such clients. In the above SMTP transaction log, the IP address of the client was 88.191.35.203. To put such client's into IndiMail's SPAM blacklist, you just need to put the IP address in the control file /etc/indimail/control/badip
# echo 88.191.35.203 >> /etc/indimail/control/badip


For turning on the BADIP functionality, you need to set the BADIPCHECK or the BADIP environment variable. i.e.
# echo badip > /service/qmail-smtpd.25/variables/BADIP
# svc -d /service/qmail-smtpd.25
# svc -u /service/qmail-smtpd.25

Clients whose IP match an entry in badip will be greeted as below
421 indimail.org sorry, your IP (::ffff:88.191.35.203) is temporarily denied (#4.7.1)
Also the client will not be able to carry out any SMTP transactions like ehlo, MAIL FROM, RCPT TO, etc
A large ISP can run the following command every day once in cron
grep "X-Bogosity, Yes" /var/log/svc/qmail.smtpd.25/current > /etc/indimail/control/badip


If your badip files becomes very large, you can also take advantage of IndiMail's ability to use cdb (or you could use MySQL too)

% sudo /usr/bin/qmail-cdb badip


Monday, April 26, 2010

Web Administration for IndiMail

I always find using the web ugly. It is a pain using the mouse almost all the time to do anything. One of the reasons I have never focussed on building a web administration tool for Indimail.

Lately my users have been pestering me if something can be done about it. I have no knowledge of web scripting, etc. But using some bit of common sense, I have managed to make qmailadmin work with IndiMail by modifying the source code (lucky for me, they are written in C).

For the admin user it provides
  1. user addition
  2. user deletion
  3. password change
  4. adding autoresponders
  5. deleting autoresponders
  6. modifying autoresponders
  7. adding forwarding addresses
  8. deleting forwarding addresses
  9. modifying forwarding addreses
  10. quota modification
For users other than the postmaster account it provides
  1. Password change
  2. add/modify/delete forwarding addresses
  3. add/modify/delete autoresponder
iwebadmin can be downloaded from
http://sourceforge.net/projects/indimail/files/iwebadmin

The RPM / Yum Repo file can be downloaded from
http://software.opensuse.org/download.html?project=home:indimail&package=iwebadmin

You can download IndiMail at
http://sourceforge.net/projects/indimail/

The RPM can be downloaded from
http://download.opensuse.org/repositories/home:/indimail/

After installation, you just need to go to http://127.0.0.1/cgi-bin/iwebadmin
The image assets get installed in /var/www/html/images/iwebadmin
The html  assets get installed in /var/indimail/share/iwebadmin

The screen shots are below


Saturday, April 24, 2010

Post Handle

IndiMail provides a handle post successful operation of few programs. A post execution handle is a program with the same name as that of the calling program but in the directory /usr/libexec/indimail. On successful completion, such programs will execute the handle program and return the status of the called handle program.
In my experience of setting up mail servers in the corporate world, often it is required that users be added to external databases which could be part of some strange enterprise applications. It could be as simple as adding users to your ldap server when creating a mailbox on IndiMail. Sometimes it could be as bad as adding users to ADS (ugh).
IndiMail (release 1.6.9 onwards) provides you a hook, to execute any program after successful completion of the programs, vadddomain, vaddaliasdomain, vdeldomain, vadduser and vdeluser, vrenamedomain, vrenameuser, vmovuser, vpasswd.
A hook can be defined by creating a script or an executable in /usr/libexec/indimail with the name of the program being executed. e.g. if you create a script named vadduser in the directory /usr/libexec/indimail, the script will get executed whenever the program vadduser is used to add a user to indimail. The execution happens only if the program completes successfully. Depending on what you need to do, you can customize the scripts in a jiffy.
The hook script name can be overridden by setting the POST_HANDLE environment variable.
See the man pages of vadddomain, vaddaliasdomain, vdeldomain, vadduser, vmoduser, vmoveuser, vdeluser, vrenamedomain, vrenameuser, vpasswd.
for more details.
Let me know if you create an interesting script.
Example of using a handle is when adding a user, you want vuserinfo to be run.
% cat /var/indimail/libexec/vadduser
exec /var/indimail/bin/vuserinfo $1

If you have the above, then this is what will happen when you add a user
% sudo /var/indimail/bin/vadduser test05@example.com
New IndiMail password for test05@example.com:
Retype new IndiMail password:
name : test05@example.com
passwd : $1$awb5a5oV$/3rsmlKSu.wzwIFhBzMf7/ (MD5)
uid : 1
gid : 0
-all services available
gecos : test05
dir : /home/mail/T2Zsym/example.com/test05 (missing)
quota : 5242880 [5.00 Mb]
curr quota : 0S,0C
Mail Store IP : 192.168.1.100 (Clustered - local)
Mail Store ID : 1000
Sql Database : 192.168.1.100:indimail:ssh-1.5-
Table Name : indimail
Relay Allowed : NO
Days inact : 0 days 00 Hrs 00 Mins 00 Secs
Added On : ( 127.0.0.1) Sat Apr 24 19:49:06 2010
last auth : Not yet logged in
last IMAP : Not yet logged in
last POP3 : Not yet logged in
PassChange : Not yet Changed
Inact Date : Not yet Inactivated
Activ Date : ( 127.0.0.1) Sat Apr 24 19:49:06 2010
Delivery Time : No Mails Delivered yet / Per Day Limit not configured


I personally use post execution handle for adding some mandatory users every time I add a new domain. So this is what my vadddomain handle looks like

% cat /var/indimail/libexec/vadddomain
/var/indimail/bin/vdominfo $1
/var/indimail/bin/valias -i '&register-spam' register-spam@$1
/var/indimail/bin/valias -i '&register-ham' register-ham@$1
/var/indimail/bin/valias -i '&spam' spam@$1
/var/indimail/bin/valias -i '&ham' ham@$1
/var/indimail/bin/vadduser -e prefilt@$1 xxxxxxxx
/var/indimail/bin/vadduser -e postfilt@$1 xxxxxxxx
/var/indimail/bin/vcfilter -i -t spamFilter -c 3 -k "Yes, spamicity=" -f Spam -b 0 -h 33 prefilt@$1
/bin/ls -dl /var/indimail/domains/$1
/bin/ls -al /var/indimail/domains/$1
exit 0


Monday, April 19, 2010

Envrules for IndiMail

IndiMail allows you to configure most of its functionality through set of environment variables. In fact there more more than 200 features that can be controlled just by setting or un-setting environment variables. envrules is applicable to qmail-smtpd, qmail-inject, qmail-local, qmail-remote as well. It can also be used to control programs called by the above programs (e.g qmail-queue). IndiMail allows you to configure quite many things using environment variables. Just set the environment variable CONTROLDIR=control2 and all qmail components of IndiMail start looking for control files in /var/indimail/control2. You can set CONTROLDIR=/etc/indimail and all control files can be conveniently placed in /etc/indimail.
Some of these environment variables can be set during the startup of various services. IndiMail has all its services configured as directories in the /service directory. As an example, if you want to force authenticated SMTP on all your users, setting the environment variable REQUIREAUTH allows you to do so.
% su
# echo 1 > /service/qmail-smtpd.587/variables/REQUIREAUTH
# svc -d /service/qmail-smtpd.587
# svc -u /service/qmail-smtpd.587


sets the qmail-smtpd running on port 587 to force authentication.
Setting environment variables in your startup script, in your .profile or your shell forces you to permanently set the environment variable to a specific value. Using envrules, IndiMail allows you to set these environment variables specific to different senders or recipients. envrules allows IndiMail platform to be tuned differently for different users. No other messaging platform, to the best of my knowledge, is capable of doing that. Another way of saying is that envrules allows your IndiMail platform to dynamically change its behavior for each and every user.
For the SMTP service, you can set different environment variables for different senders. All that is required is to define the following in the control file /etc/indimail/control/from.envrules. The format of this file is of the form
pattern:envar1=val,envar2=val,...]
where pattern is a regular expression which matches a sender. envar1, envar2 are list of environment variables to be set. If val is omitted, the environment variable is unset. The name of the control file can be overridden by the environment variable FROMRULES. e.g. having the following in from.envrules
*consultant:REQUIREAUTH=1,NORELAY=1
forces all users whose email ids end with 'consultant' to authenticate while sending mails. Also such users will be prevented from sending mails to outside your domain.
ceo@example.com:DATASIZE=
Removes all message size restrictions for the user whose email address is ceo@example.com, by unsetting the environment variable DATASIZE.
You can also set envrules on per recipient basis. This gets set for qmail-local & qmail-remote. The control file to be used in this case is /etc/indimail/control/rcpt.envrules. The filename can be overridden by RCPTRULES environment variable.
.e.g
*.yahoo.com:OUTGOINGIP=192.168.2.100
The OUTGOINGIP environment variable is used by qmail-remote to bind on a specific IP address when connecting to the remote SMTP server. The above envrule forces qmail-remote to use 192.168.2.100 as the outgoing IP address when sending mails to any recipient at yahoo.com.
For SMTP service the following the following list of environment variables can be modified using envrules
REQUIREAUTH, QREGEX, ENFORCE_FQDN_HELO, DATABYTES, BADHELOCHECK, BADHELO, BADHOST, BADHOSTCHECK, TCPPARANOID, NODNSCHECK, VIRUSCHECK, VIRUSFORWARD, REMOVEHEADERS, ENVHEADERS, LOGHEADERS, LOGHEADERFD, SIGNATURES, BODYCHECK, BADMAILFROM, BADMAILFROMPATTERNS, BOUNCEMAIL, CUGMAIL, MASQUERADE, BADRCPTTO, BADRCPTPATTERNS, GOODRCPTTO, GOODRCPTPATTERNS, GREYIP, GREETDELAY, CLIENTCA, TLSCIPHERS, SERVERCERT, BLACKHOLERCPT, BLACKHOLERCPTPATTERNS, SIGNKEY, SIGNKEYSTALE, SPFBEHAVIOR, TMPDIR, TARPITCOUNT, TARPITDELAY, MAXRECIPIENTS, MAX_RCPT_ERRCOUNT, AUTH_ALL, CHECKRELAY, CONTROLDIR, ANTISPOOFING, CHECKRECIPIENT, SPAMFILTER, LOGFILTER, SPAMFILTERARGS, SPAMEXITCODE, REJECTSPAM, SPAMREDIRECT, SPAMIGNORE, SPAMIGNOREPATTERNS, FILTERARGS, QUEUEDIR, QUEUE_BASE, QUEUE_START, QUEUE_COUNT, QMAILQUEUE, QUEUEPROG, RELAYCLIENT, QQEH, BADEXT, BADEXTPATTERNS, ACCESSLIST, EXTRAQUEUE, QUARANTINE, QHPSI, QHPSIMINSIZE, QHPSIMAXSIZE, QHPSIRC, QHPSIRN, USE_FSYNC, SCANCMD, PLUGINDIR, QUEUE_PLUGIN, PASSWORD_HASH, MAKESEEKABLE, MIN_FREE, ERROR_FD, DKSIGN, DKVERIFY, DKSIGNOPTIONS, DKQUEUE, DKEXCLUDEHEADERS, DKIMSIGN, DKIMVERIFY, DKIMPRACTICE, DKIMIDENTITY, DKIMEXPIRE, SIGN_PRACTICE DKIMQUEUE, SIGNATUREDOMAINS, and NOSIGNATUREDOMAINS
The following list of environment variables can be modified using envrules if QMAILLOCAL and QMAILREMOTE is set to /var/indimail/bin/spawn-filter.
QREGEX, SPAMFILTER, LOGFILTER, SPAMFILTERARGS, FILTERARGS, SPAMEXITCODE, HAMEXITCODE, UNSUREEXITCODE, REJECTSPAM, SPAMREDIRECT, SPAMIGNORE, SPAMIGNOREPATTERNS, DATABYTES, MDA, MYSQL_INIT_COMMAND, MYSQL_READ_DEFAULT_FILE, MYSQL_READ_DEFAULT_GROUP, MYSQL_OPT_CONNECT_TIMEOUT, MYSQL_OPT_READ_TIMEOUT, MYSQL_OPT_WRITE_TIMEOUT, QUEUEDIR, QUEUE_BASE, QUEUE_START, QUEUE_COUNT, and TMPDIR


The following list of environment variables which can be modified using envrules are specfic to qmail-remote.
CONTROLDIR, SMTPROUTE, SIGNKEY, OUTGOINGIP, DOMAINBINDINGS, AUTH_SMTP, MIN_PENALTY, and MAX_TOLERANCE
The following list of environment variables which can be modified using envrules are specfic to qmail-local.
USE_SYNCDIR, USE_FSYNC, and LOCALDOMAINS
Do man qmail-smtpd(8), spawn-filter(8) to know the full list of environment variables that can be controlled using envrules.

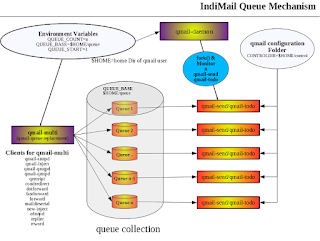
IndiMail Queue Mechanism

Indimail has the ability of configuring multiple local and remote queues. A queue is a location on your hard disk where email are deposited ...